설치 전 준비사항
EOSIO DApp을 개발하기 위해 우선 EOSIO의 node를 설치해야한다.
오픈소스이기 때문에 직접 source를 다운받아서 빌드할 수 있지만, EOSIO portal에서는 docker를 이용한 설치 가이드가 있어서 docker를 이용해 설치했다.
docker는 다양한 소프트웨어들을 컴파일해 모아놓은 컨테이너를 관리하는 프로그램이라고 생각하면 된다. 필요한 패키지들이 이미 컨테이너에 포함되어 있기 때문에 직접 소스를 빌드하는 것보다 쉽게 설치할 수 있다는 장점이 있다. VM에서 image파일로 OS설치하는 것과 비슷하다고 보면 된다.
docker를 이용한 설치과정은 EOSIO portal에도 아주 자세히 설명이 써있지만 한번더 나름대로 정리해보았다.
현재 EOSIO는 window를 지원하지 않기 때문에 window 머신에서는 VM을 이용해 linux를 설치해야한다.
나도 Virtual Box에 ubuntu 18.04를 설치했다. -> VM에 ubuntu설치하기
또 docker를 이용하기 때문에 docker 설치도 필요하다 -> docker 설치
링크에 있는대로 따라하면 어렵지 않게 설치할 수 있다.
docker로 EOSIO container 설치하기
우선 작업할 directory를 만든다
woosung@woosungs:~$ mkdir contracts
woosung@woosungs:~$ cd contracts
그 다음에 docker에 미리 컴파일된 eosio의 image를 다운받는다. 아래그림처럼 permission 거부가 나면 sudo를 붙여준다.
woosung@woosungs:~$ docker pull eosio/eos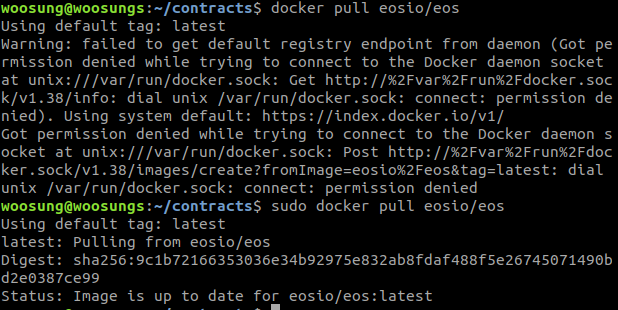
이제 EOSIO의 node를 booting한다. 역시 permission에러가 나면 sudo를 붙여준다.
–volume이 있는 줄은 본인의 작업 directory를 입력하면 된다.
woosung@woosungs:~$ docker run --name eosio \
  --publish 7777:7777 \
  --publish 127.0.0.1:5555:5555 \
  --volume /home/woosung/contracts:/home/woosung/contracts \
  --detach \
  eosio/eos \
  /bin/bash -c \
  "keosd --http-server-address=0.0.0.0:5555 & exec nodeos -e -p eosio --plugin eosio::producer_plugin --plugin eosio::history_plugin --plugin eosio::chain_api_plugin --plugin eosio::history_plugin --plugin eosio::history_api_plugin --plugin eosio::http_plugin -d /mnt/dev/data --config-dir /mnt/dev/config --http-server-address=0.0.0.0:7777 --access-control-allow-origin=* --contracts-console --http-validate-host=false --filter-on='*'"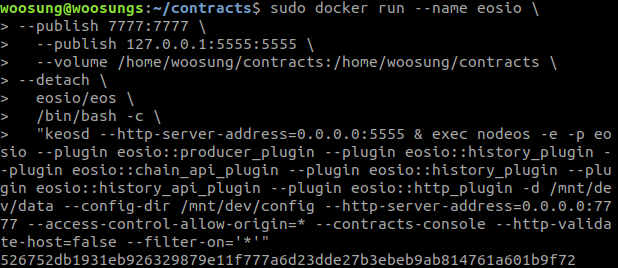
이제 booting이 잘 돼서 block생성이 잘 됐는지 확인해본다.
woosung@woosungs:~$ docker log --tail 10 eosio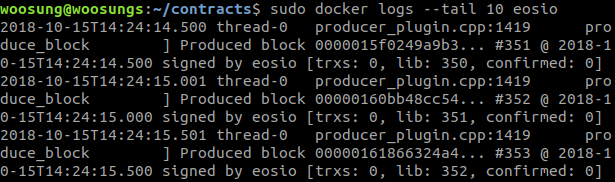
block생성까지 잘 됐으니 지갑이 있나 확인해보자. shell을 오픈하고 해당 shell에서 명령어 수행을 할 것이다.
woosung@woosungs:~$ docker exec -it eosio bash쉘을 열었으니 지갑이 있는지 명령어를 입력해본다.
root@ :#/ cleos --wallet-url http://127.0.0.1:5555 wallet list keys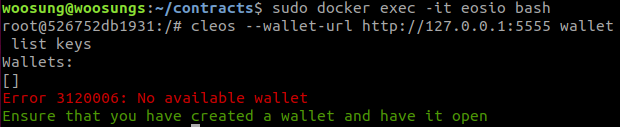
위의 그림처럼 Error가 난다. 아직 Wallet생성을 안해서 그런거 같으니 그 다음으로 넘어간다.
이제 shell을 exit명령어로 나온다음에 Nodeos의 endpoints를 확인해보자.(아직 뭔지 모르겠음)
woosung@woosungs:~$ curl http://localhost:7777/v1/chain/get_info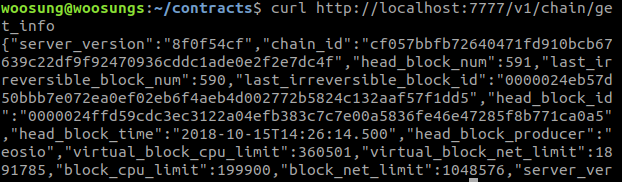
이제 추가적으로 bashrc파일에 alias셋팅만 하면 끝이다.
woosung@woosungs:~$ vim ~/.bashrc
//아래의 코드를 추가한다
alias cleos='docker exec -it eosio /opt/eosio/bin/cleos --url http://127.0.0.1:7777 --wallet-url http://127.0.0.1:5555'
만약 컴퓨터를 리부팅하면 아래의 명령어로 docker부터 실행해야한다.
woosung@woosungs:~$ docker start eosio